Model Placer
What it is ℹ️
Place complex models in sequence and seamlessly connect them.
When to use 🧭
- When you want to place models in sequence or in a line
- When you want to place complex models in sequence and automatically merge matching parts within models
Panels 🎛️
Model Template Settings
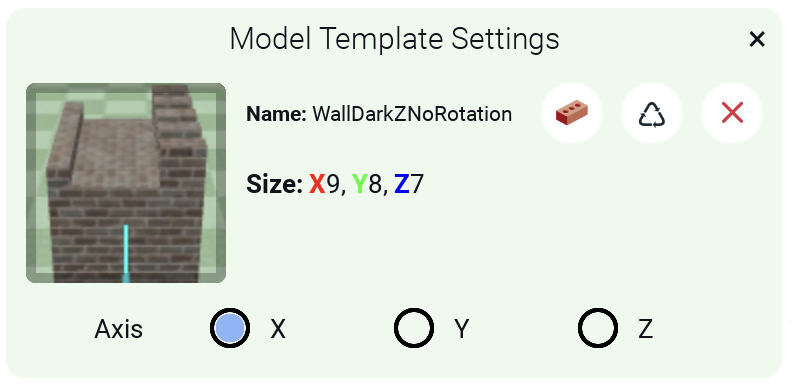
Select a model or part to use as a template.
The selection box shows the currently selected template, its name, and size (X×Y×Z), and whether the size is read from PrimaryPart (if present) or from the model’s bounding box.
You can change the template by selecting another model and clicking "Change to Model".
- Add PrimaryPart button: Adds a
PrimaryPartto the model in the current orientation (available only forModel). If you have problems with model orientation, create or adjust aPrimaryPartand try again. - Reload Template button: Reloads the template. Useful if you make changes to your template model.
- Reset Template button: Resets the template.
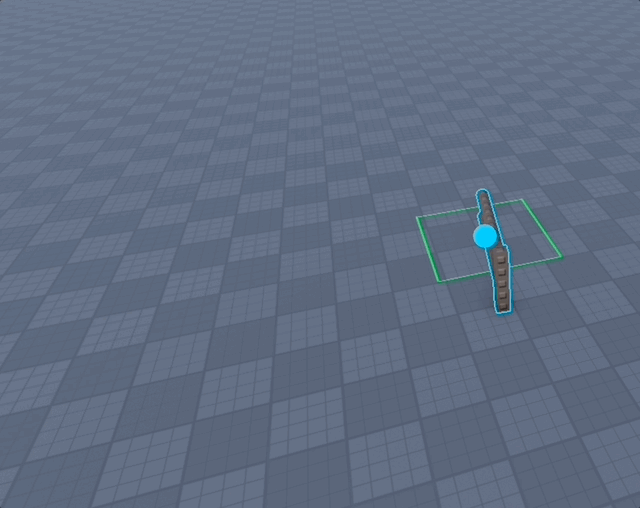
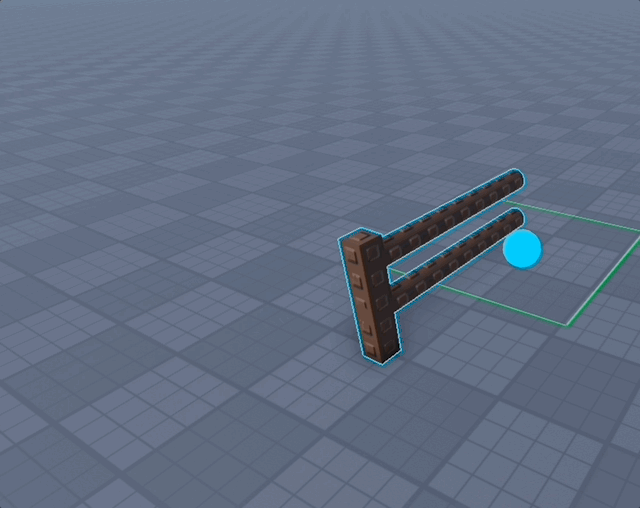
Axis
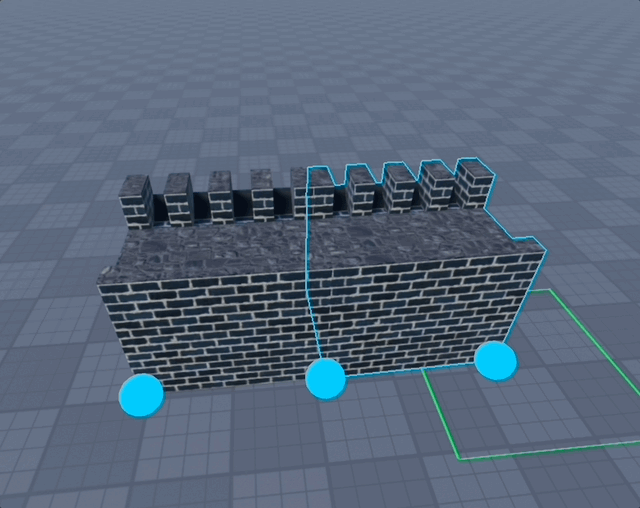
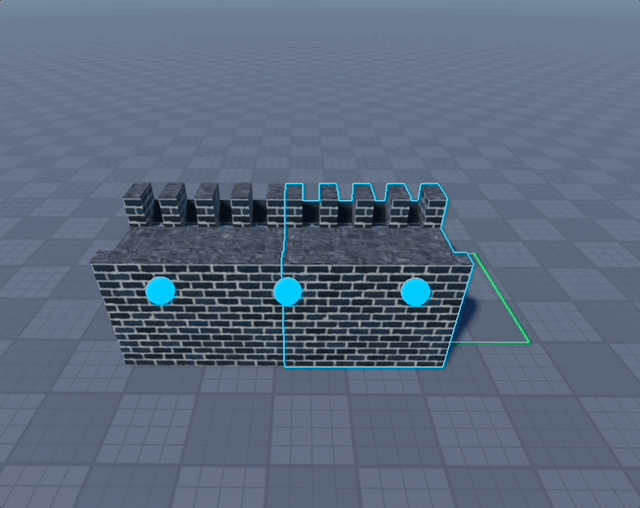
Controls the direction in which consecutive models are placed. The preview shows a neon blue guide along the primary axis. Saved per template — see Settings persistence below.
-
If axis detection behaves unexpectedly, add or adjust a
PrimaryPartusing "Add primary part 🧱" and try again. -
Flip Model: Reverses the placement axis direction for templates that were authored facing the other way. The axis indicator and placement offset update to match, so the model lines up without re-authoring its
PrimaryPart.
Corner Settings / Other Settings
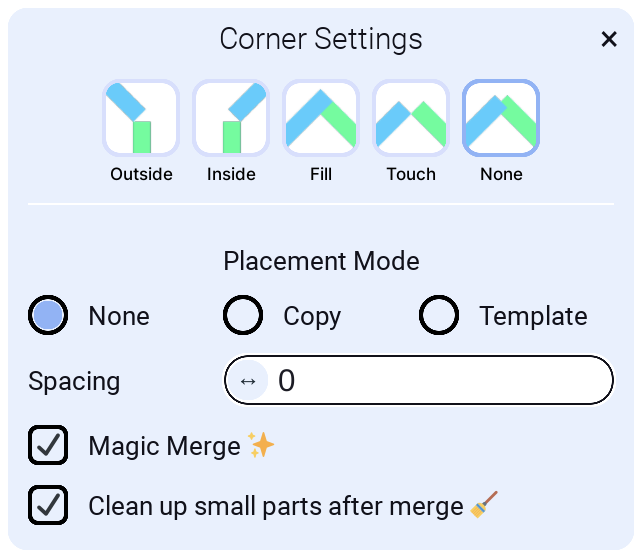
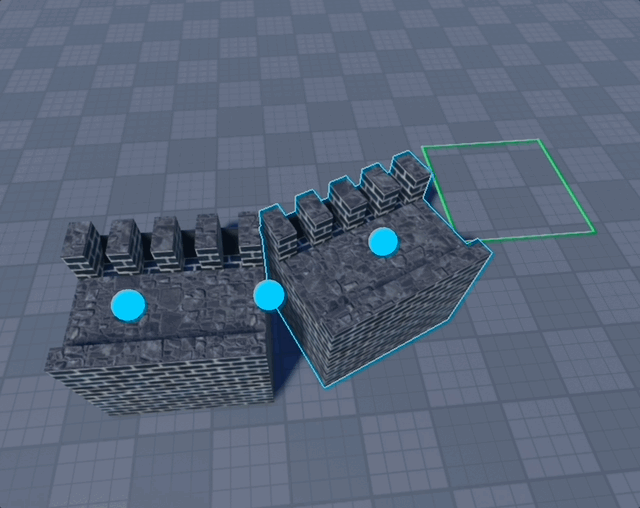
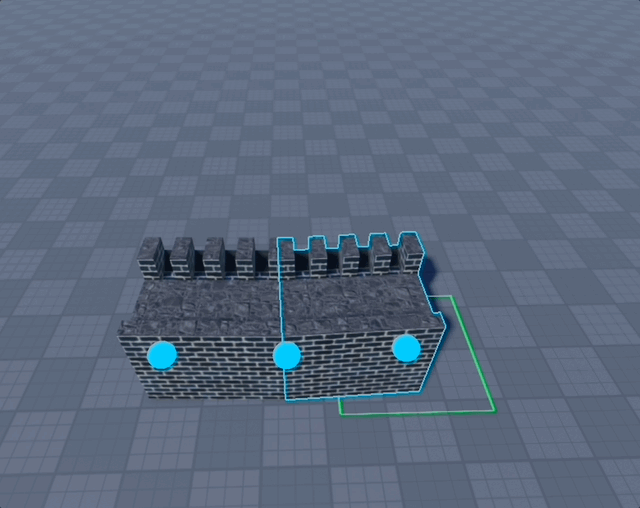
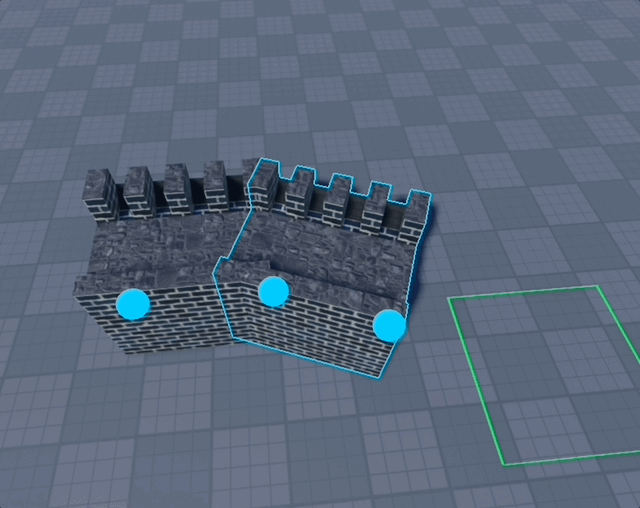
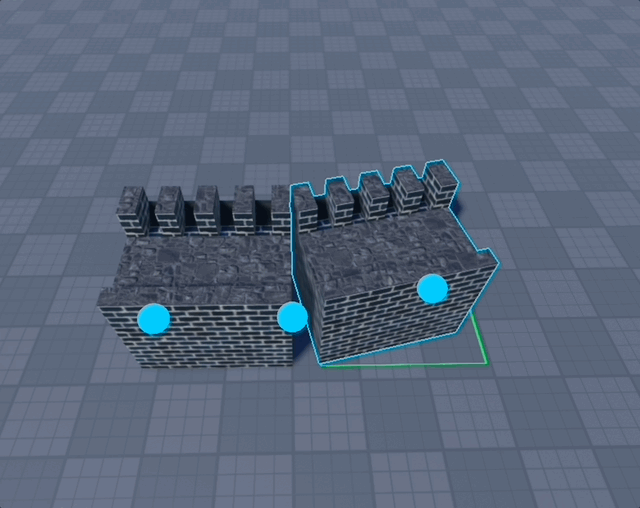
Corner Alignment modes:
-
Outside: One outer corner always touches (inverse of Inside).
Using Magic Merge ✨:

-
Inside: One inner corner always touches (inverse of Outside).
Using Magic Merge ✨:
-
Fill: Moves the model so its corners connect and there is no gap.
Using Magic Merge ✨:
-
Touch: Has the closest corner always touching (dynamic version of Outside/Inside).
Using Magic Merge ✨:
-
None: The model’s center is touching.
Using Magic Merge ✨:
-
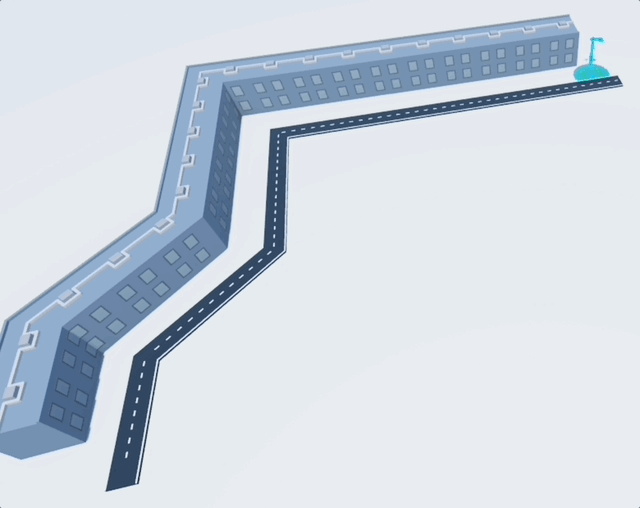
Magic Merge ✨: Seamlessly merges connecting parts as you place models; helpful for walls/fences so segments look continuous. The chosen corner mode affects the merge: "Fill" removes or reduces parts, "Touch" extends parts, and "None" does both. Try different modes to get the effect you want.
-
Clean up small parts after merge 🧹: Removes unneeded tiny parts left after Magic Merge. These can appear when "Fill" or "None" corner modes are selected.
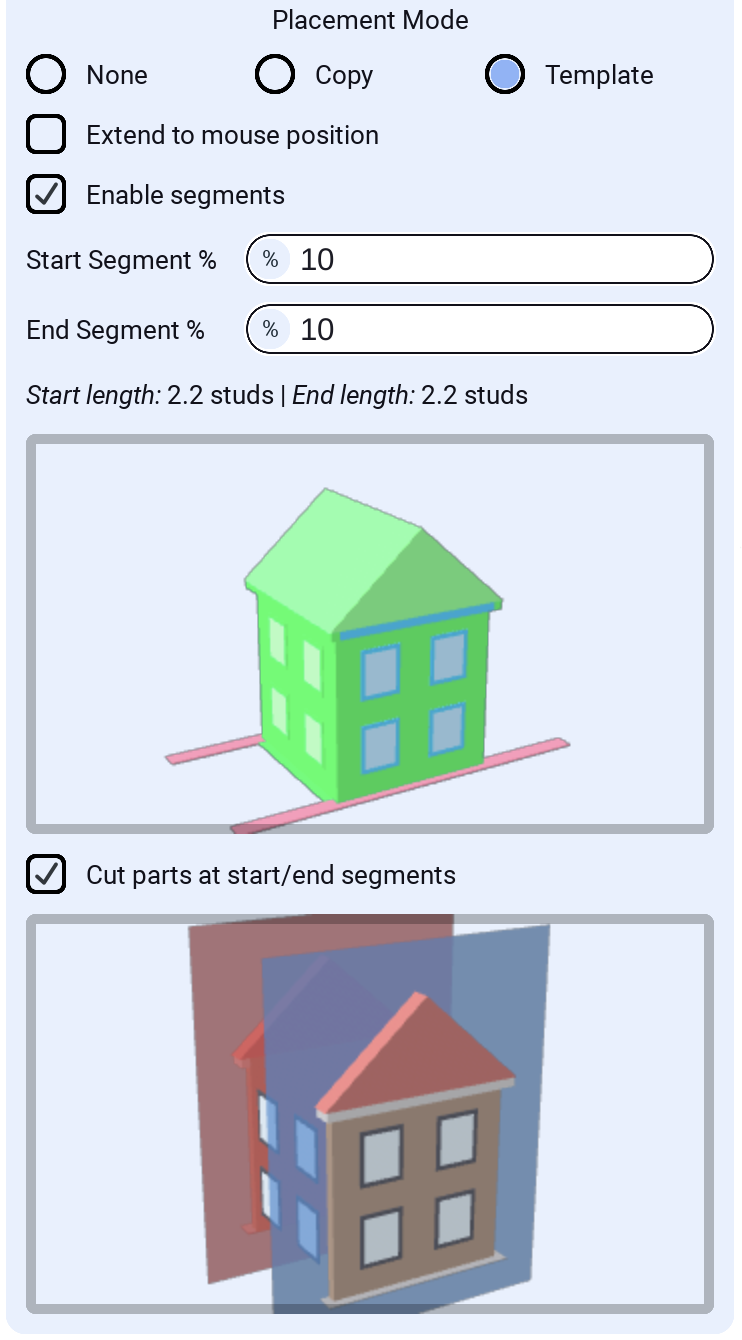
Placement Mode
Choose how the plugin places your model as you add points:
- None: Places a single model per click.
- Copy: Places repeated copies of the current template up to the current mouse position from the previous point.
- Template: Uses Start/End Segment % to create start/end caps and repeats/extends the middle segment between points (best for modular fences, walls, and roads).
Template Mode
How it behaves
- Uses Start/End Segment % to split the template into start cap, middle span, and end cap along the primary axis.
- At each point, the start cap is placed; between points, the middle span repeats or extends; the end cap closes the run when configured.
- Preview shows a color legend (start/end: blue; middle: green) and a readout in studs for the selected percentages.
Start/End segments
- 0/0 (default): single segment is used as‑is (no caps).
- Only Start or only End is set: two segments (a cap at one side and the middle).
- Both Start and End are set: three segments (start cap, middle, end cap).
- Valid range is 0–49% for both.
Extend to mouse position
- Enabled: The template extends exactly to your mouse position, allowing for any length.
- Disabled: The template snaps to fixed segment widths based on your model size — ideal when repeating parts must line up for Magic Merge.
Cut parts at start/end segments
You can create your model as you like, without taking caps into account. Creating caps happens on the fly!
- Enabled: Slices any parts of the template that cross the Start/End boundaries. The plugin creates two thin cutting planes at the selected percentages and trims intersecting parts so the start and end caps are clean and the middle can repeat seamlessly.
- Disabled: Nothing is cut.
- Your original template is never edited — the cutting happens on a temporary clone used to generate the start/middle/end prototypes.
- A small preview appears below the toggle showing where the cuts happen (two translucent planes at the boundaries). It shows the cut start and end caps, with the repeatable middle section between them.
- Note: On very dense templates, cutting may take a moment.
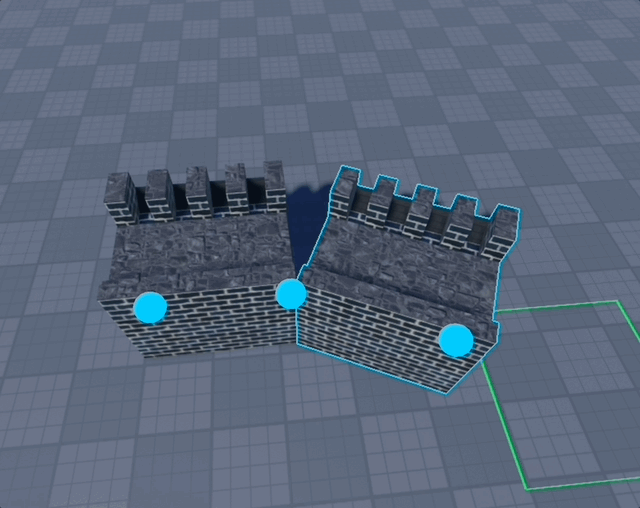
Using model with start segment defined
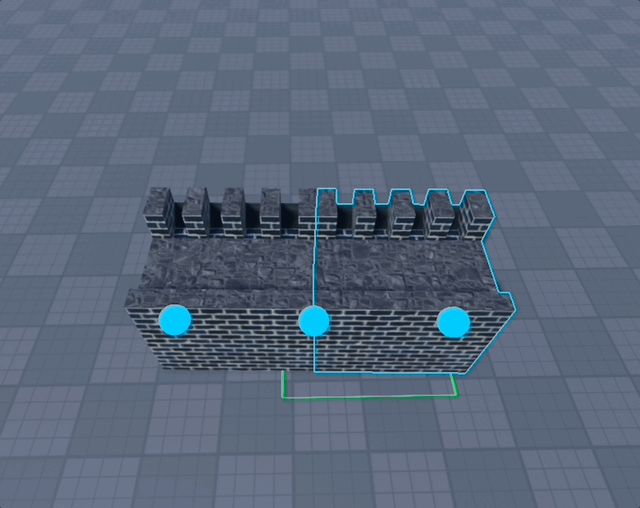
Using a similar model without a start segment (0%).
Spacing:
- Spacing (studs) applies in None and Copy placement modes. In Template mode, spacing is governed by the segmenting/segment widths.
Copy Mode
How it behaves
- Places multiple models in one click between the last point and your current mouse position.
- With Spacing, each model after the first is placed after a full pre-gap; all gaps are equal (including first → second).
- With Extend to mouse position enabled, the run ends exactly at your mouse position.
Extend to mouse position
- Enabled: the next point recorded is your exact mouse position (not the clamped repeat end). This lets you finish runs precisely at arbitrary lengths.
- Disabled: the path advances by whole model lengths (plus spacing) from the last point.
Spacing with Copy
- Spacing is applied as a full pre-gap before each placed model (except the very first), so the first‑to‑second gap matches all other gaps.
- This also applies in the live preview (after your first point, only the repeated preview copies are rendered, so the preview spacing matches the final result).
Settings persistence
Some settings are saved to the template model/part as attributes instead of plugin storage. This makes switching templates easier — you do not have to reconfigure each time.
Settings saved to template attributes:
StartSegmentPercentEndSegmentPercentPrimaryAxisMagicMergeEnabled
Note: These attributes are stored on the template only. The plugin does not keep them on finalized placed results.
Related 🔗
- See Common Settings for shared options across builders
- See Shortcuts for shared options across builders